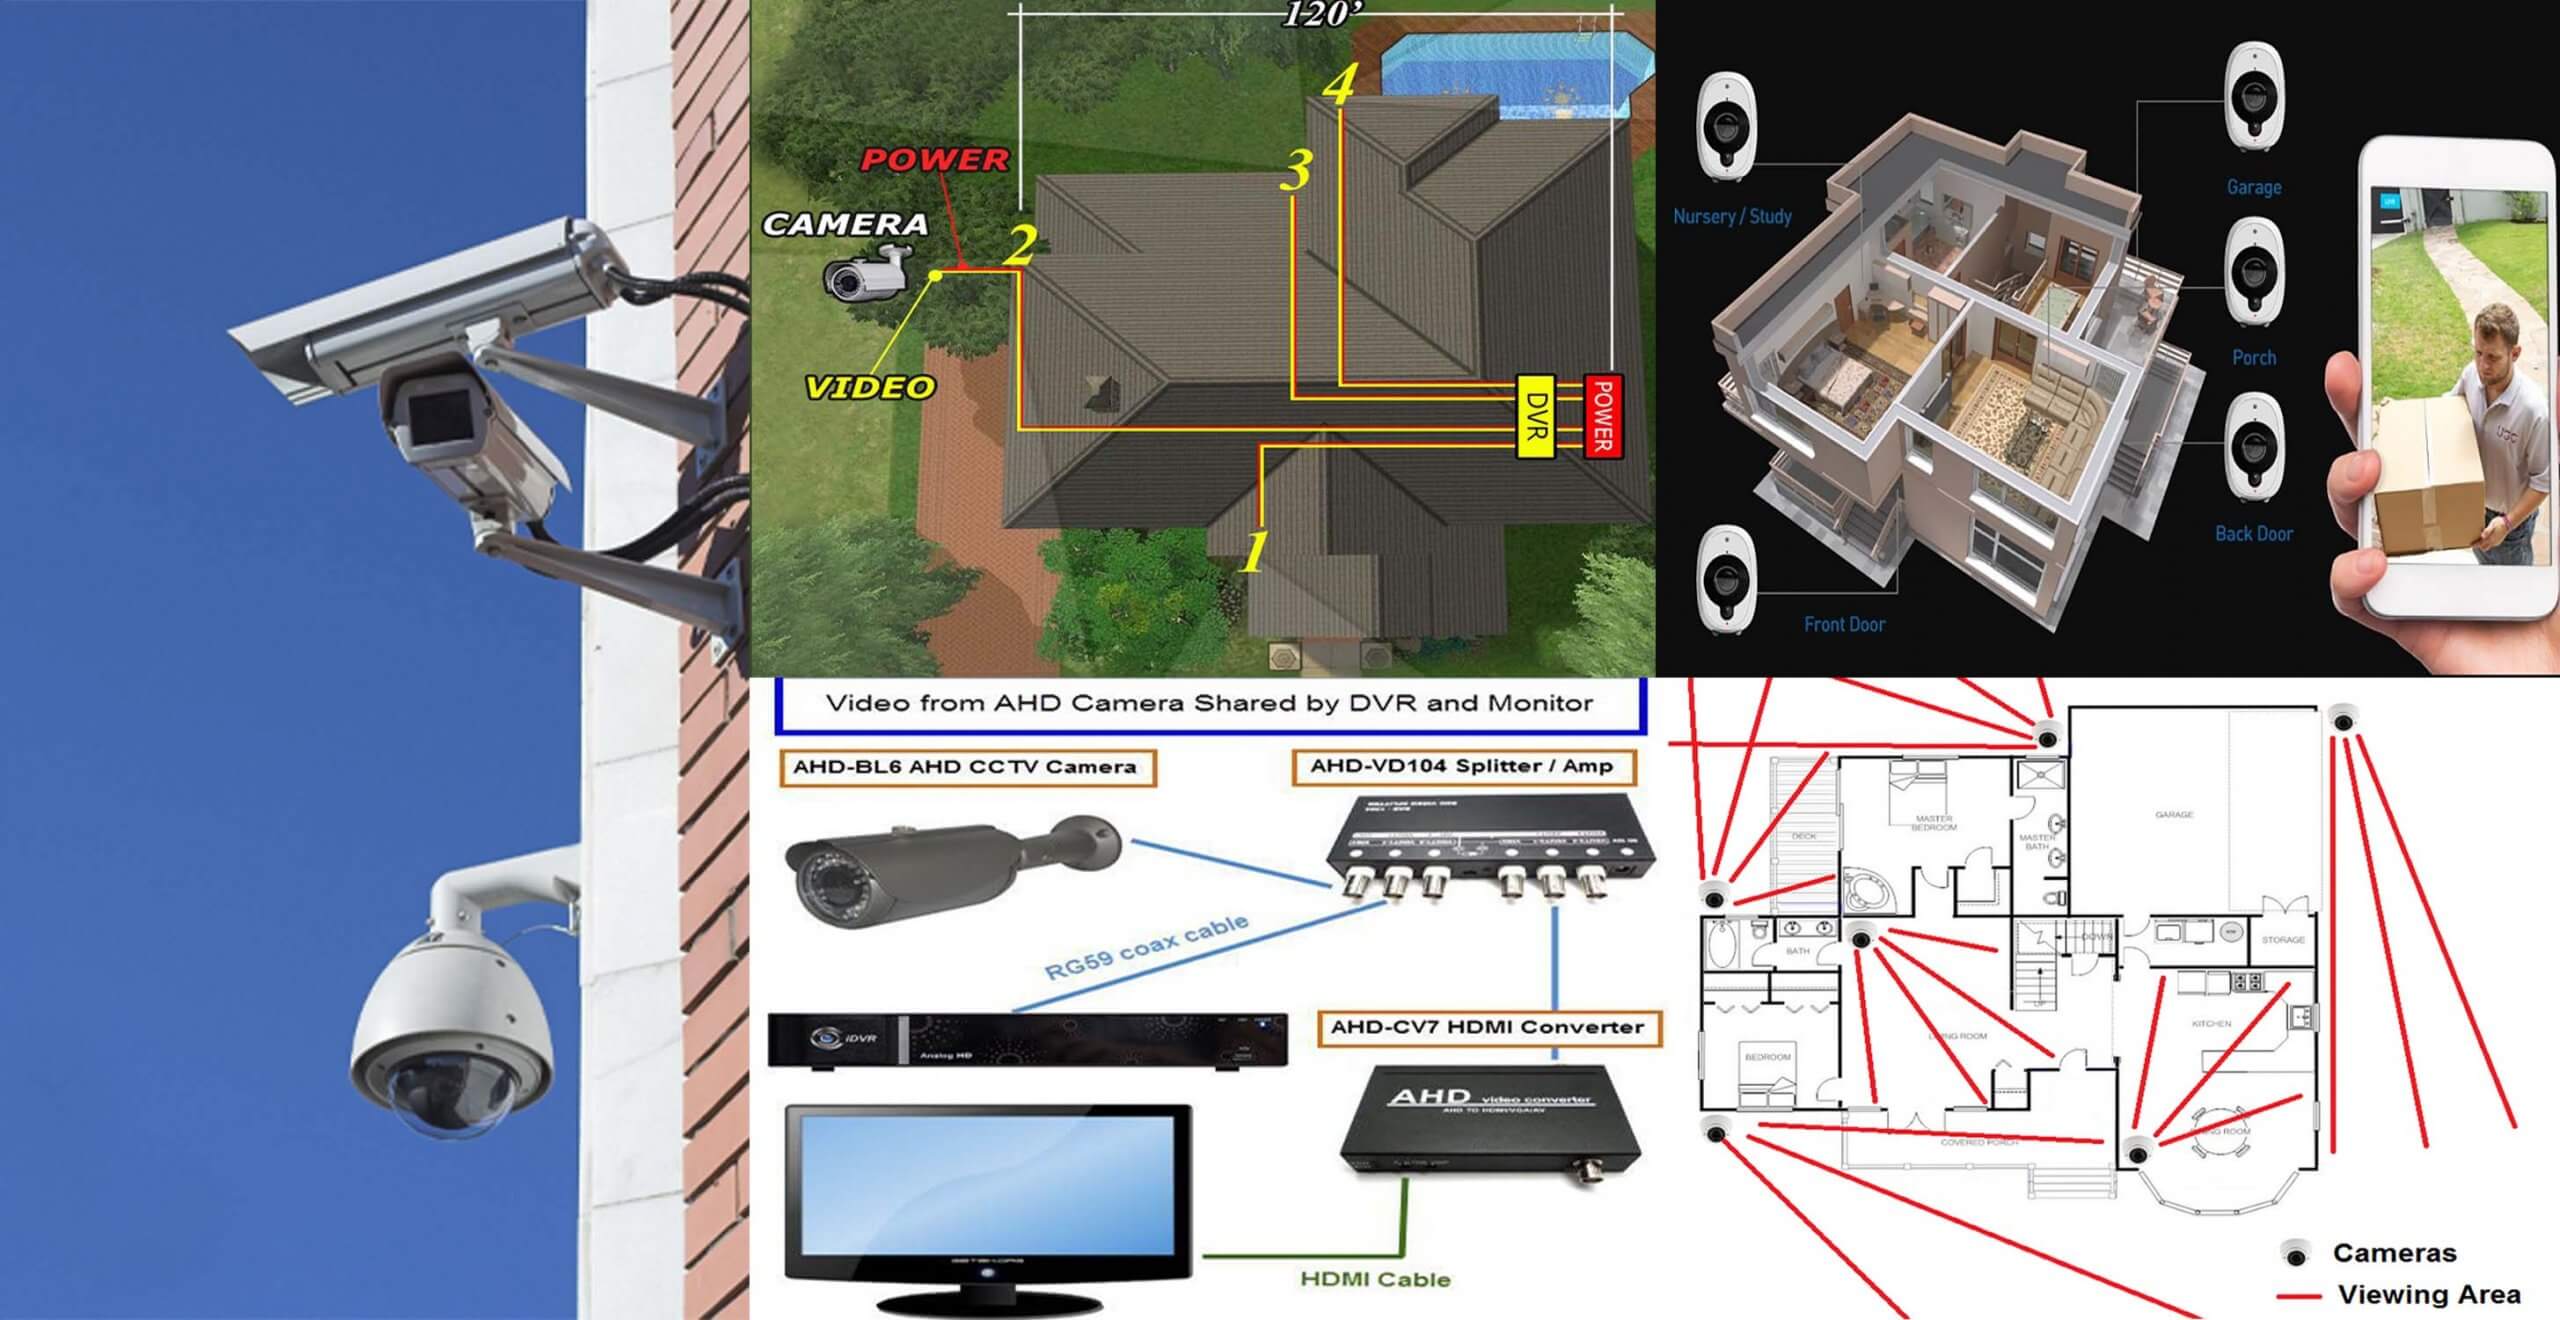
Place security cameras where people and vehicles are most likely to approach or enter your U.S. home: the front door, driveway, garage, back door, side gate, and other accessible ground-floor entry points. Aim each camera at an approach path or entry point rather than trying to cover the entire property with one wide shot.
For a typical American home, the best security camera placement starts with the routes that lead directly to the house. A front-door camera can capture visitors and deliveries, a driveway camera can show approaching people and vehicles, and cameras covering rear or side entrances can address areas that may be less visible from the street.
Good placement is not simply a matter of putting cameras as high or as wide as possible. The camera needs a useful view, adequate lighting, dependable power or connectivity, and a mounting position that makes the resulting footage useful. Outdoor cameras should also be positioned so they do not unnecessarily record private areas belonging to neighbors or other people.
Current home-security placement guidance commonly prioritizes front and rear entrances, driveways, garages, side access points, and other ground-floor approaches. The Federal Trade Commission also recommends securing connected cameras and the home network with strong passwords, current software, and appropriate security settings.
Source: engineeringdiscoveries.com
Start With the Most Important Areas Around Your House
The best starting point is to map how someone would approach your home rather than trying to watch every square foot of the property. Walk around your house and identify every normal route to a door, garage, gate, window, patio, or other accessible area.
For many U.S. homes, the front entrance and driveway deserve the highest priority because they handle regular pedestrian and vehicle traffic. After those areas are covered, look for less visible routes such as a side gate, backyard path, rear door, or detached garage.
A camera should have a clear purpose. For example, one camera might be responsible for the front door and package area, while another watches the driveway and vehicle approach. Giving each camera a defined job makes it easier to identify blind spots before installation.
Source: static.wixstatic.com
Front door
Monitor visitors, deliveries, the porch, and the approach to the entrance.
Driveway
Watch approaching vehicles and people before they reach the house or garage.
Garage
Cover the garage door and, when applicable, a separate side or service entrance.
Rear entrance
Monitor a back door, patio door, sliding door, or another accessible entrance.
Side gate
Cover a narrow route between the front and backyard that may otherwise become a blind spot.
Think in Terms of Routes, Not Just Areas
A camera pointed at the middle of a large lawn may show plenty of activity but little useful detail. A camera aimed along the walkway leading to the front door can keep an approaching person larger in the frame for longer. The same principle applies to driveways, side paths, and gates.
Before drilling holes, stand where you plan to mount the camera and consider what a person would see while walking toward the house. The goal is to capture the approach and the destination without unnecessary background.
Follow the approach
Aim along a walkway, driveway, gate path, or other route people naturally use.
Reduce empty space
Avoid using most of the frame for sky, pavement, or distant landscaping when the important subject is near an entrance.
Where to Place a Security Camera at the Front Door
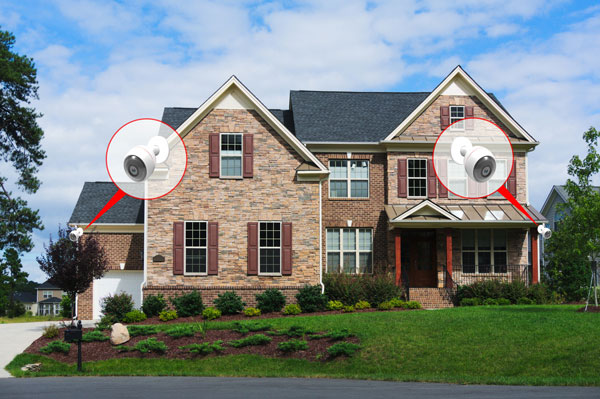
The front door is usually one of the first locations to consider because it combines security monitoring with everyday activity such as deliveries, guests, service workers, and family members arriving home.
Position the camera so it can see the person approaching the entrance as well as the immediate doorway area. A camera mounted too far to one side may miss someone standing directly in front of the door, while a camera pointed too broadly may make faces appear small.
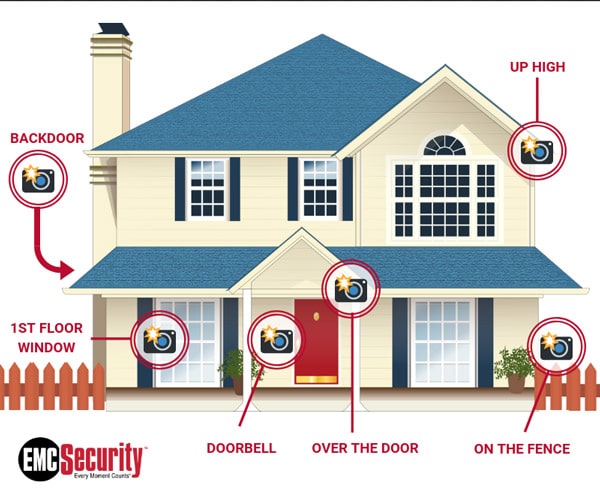
A video doorbell can be useful when the main goal is to see and communicate with visitors at the door. A separate outdoor camera may be more appropriate when you also need to monitor a longer walkway, porch, driveway, or front-yard approach.
Source: emcsecurity.com
Capture the approach
Include enough of the walkway or approach area to show how someone reached the door.
Watch for obstructions
Check porch columns, railings, decorations, plants, roof supports, and other objects that can block a person’s face.
Control glare
Avoid aiming directly toward a bright porch light, low sun, or large bright section of sky.
Check package visibility
If package monitoring matters, frame the usual delivery area without unnecessarily widening the view into neighboring property.
Should a Front-Door Camera Face the Street?
It can be reasonable for a front-door camera to include some publicly visible area because the approach to a home often connects to a sidewalk or street. However, a wider field of view is not automatically better. Frame the camera around the security task and use privacy zones or masking features when available.
Recording rules vary by location, particularly for audio. Before enabling continuous audio recording, homeowners should check applicable state and local requirements and the camera manufacturer’s settings.
Keep the view purposeful
Record the entrance and approach that matter for home security instead of deliberately monitoring unrelated neighboring activity.
Use privacy controls
Privacy zones, masking, or disabling audio can reduce unnecessary collection when supported by the camera.
Where to Place Security Cameras in the Driveway and Garage
The driveway camera should normally watch the route toward the house rather than simply pointing at parked vehicles. A useful view can show approaching people, vehicles entering the property, and movement toward the garage or front entrance.
If your garage has a separate pedestrian door or service entrance, treat that doorway as its own access point. A driveway camera may not provide a clear enough view of someone standing at a side garage door.
Avoid placing the camera where vehicle headlights, direct sunlight, or reflective surfaces regularly overwhelm the image. Test the view when a car is actually positioned in the driveway because parked vehicles can create unexpected blind spots.
Frame the driveway so approaching people and vehicles enter the useful part of the image.
Check vehicle obstruction
Make sure parked cars do not hide the garage door, walkway, or another access route.
Separate important entrances
Add another camera when a side garage door or pedestrian entrance cannot be clearly covered by the driveway camera.
Test headlights
Check the image after dark with vehicle headlights facing the camera because strong light can reduce visible detail.
Should the Driveway Camera Face the Street?
Not necessarily. The camera’s primary purpose should usually be the property approach and the areas you need to monitor. A camera facing directly toward a road may capture excessive traffic and create unnecessary motion alerts while making people near your home appear smaller.
A side-mounted position can sometimes provide a more useful view of movement across a driveway or walkway. The exact position depends on the driveway shape, camera field of view, lighting, and whether the camera uses a motion sensor that performs better with movement across its detection area.
Prioritize useful detail
A closer view of the property approach is often more useful than a very wide view of the entire street.
Consider motion detection
Check how the camera detects movement because some sensors respond differently to people moving across the frame versus directly toward the camera.
Place Cameras at the Back Door, Patio, and Backyard
Rear entrances deserve attention because they may be less visible from the street than the front of the house. Depending on the property, this can include a back door, sliding glass door, patio entrance, basement entrance, or stairs leading to the home.
Place the camera so the rear door and the route approaching it remain visible. If a fence gate provides access to the backyard, consider whether a separate camera is needed at that gate. The goal is to understand how someone reached the rear entrance, not simply to record a large area of grass.
Backyard cameras should also account for outdoor lighting. Trees, fences, patio furniture, and landscaping can look harmless during the day but become major obstructions or sources of infrared reflection at night.
Source: cmple.com
Rear door
Capture the doorway and the path someone would use to approach it.
Sliding doors
Include patio or sliding-door approaches when they provide direct access to the house.
Back gate
Monitor a gate when it creates an otherwise uncovered route into the backyard.
Outdoor storage
Consider a detached shed or other valuable structure if it has a separate approach that your house cameras cannot see.
Do You Need a Camera in the Middle of the Backyard?
Usually, not as a first priority. A perimeter or entry-point camera is often more useful than a camera positioned in the middle of a large yard. If the backyard contains a pool, detached garage, shed, gate, equipment area, or another specific security concern, a dedicated camera can make sense.
Use the property’s actual access routes to decide. A small yard with one rear door may need only an entrance-focused camera, while a large property with multiple gates and outbuildings may require additional coverage.
Small backyard
Start with the rear door and any gate or walkway leading to it.
Large backyard
Add cameras for separate access routes or detached structures that cannot be seen from the house.
Cover Side Gates and Narrow Access Paths
Side yards are easy to overlook because they may be narrow and difficult to see from inside the house. Yet a side gate can connect the front and backyard and create an access route that is not covered by a front-facing camera.
If a person must pass through a gate or narrow passage before reaching the backyard, position the camera to see the gate and enough of the path to show the direction of movement. Avoid aiming through dense vegetation that can obscure faces or trigger unnecessary motion alerts.
Source: bobvila.com
Gate latch
Make the gate itself visible so the recording shows the access point rather than only the yard beyond it.
Narrow passage
Use the natural path of movement to keep people within the useful portion of the frame.
Vegetation
Trim or reposition plants that block the camera or repeatedly trigger motion detection.
Overlap
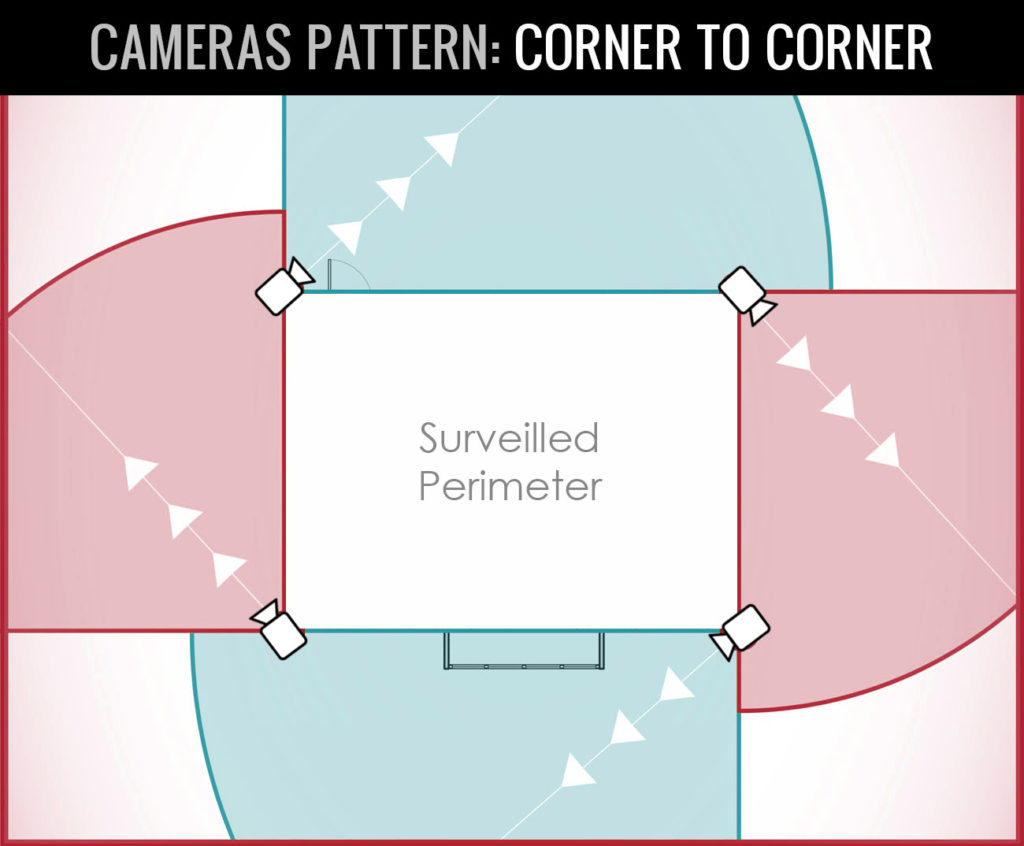
When practical, allow nearby cameras to provide overlapping views around corners so a person does not disappear immediately after leaving one camera’s frame.
Where Should a Side-Yard Camera Point?
Point it along the route between the gate and the house rather than directly across an empty side yard. This orientation can provide more useful information about movement and reduce wasted image area.
If the side passage is extremely narrow, check the camera’s minimum focusing distance and field of view before installation. A camera that is too close to a wall or gate may have an obstructed or distorted view.
Follow the path
Use the direction people naturally travel through the passage as the main viewing axis.
Check nearby surfaces
Walls and fences close to the lens can reflect infrared illumination at night and reduce image quality.
Where to Place Indoor Security Cameras
Indoor cameras should generally cover shared spaces and movement routes rather than private rooms. Useful locations can include a main hallway, a stairway, a living area, or an interior approach to an important entrance.
A hallway or stairway can act as a natural choke point because people moving between parts of the home have to pass through it. However, the right location depends on the floor plan. A camera should not be placed merely because a room seems central if it creates unnecessary privacy concerns.
For homes with children, caregivers, pets, or other occupants, consider who may be recorded and why. Security should be balanced against reasonable expectations of privacy and any applicable laws or household rules.
Source: palmer-electric.com
Main hallway
A hallway can provide visibility into movement between rooms without placing a camera inside a private room.
Main stairway
A stairway can be useful when it is a primary route between floors.
Shared living area
Use a camera in a common area only when there is a clear security or monitoring purpose.
Entry transition
An interior camera near a main entrance can provide another view of movement into the house.
Places You Generally Should Not Put Security Cameras
Bedrooms and bathrooms are generally poor locations for home security cameras because people have a strong expectation of privacy in these spaces. Other private areas should also be evaluated carefully before installing a camera.
The same privacy principle applies outdoors. Avoid intentionally framing a neighbor’s private backyard, bedroom window, bathroom window, or similarly private area when the security purpose can be achieved with a narrower view.
Bathrooms
Avoid security cameras in bathrooms because of the highly private nature of the space.
Bedrooms
Do not use cameras in bedrooms unless there is a specific lawful and carefully considered reason, and privacy implications have been addressed.
Neighbor’s private areas
Frame outdoor cameras so they serve your property’s security purpose without unnecessarily monitoring private areas outside your property.
Sensitive personal spaces
Consider whether the camera records areas where occupants, guests, or workers reasonably expect privacy.
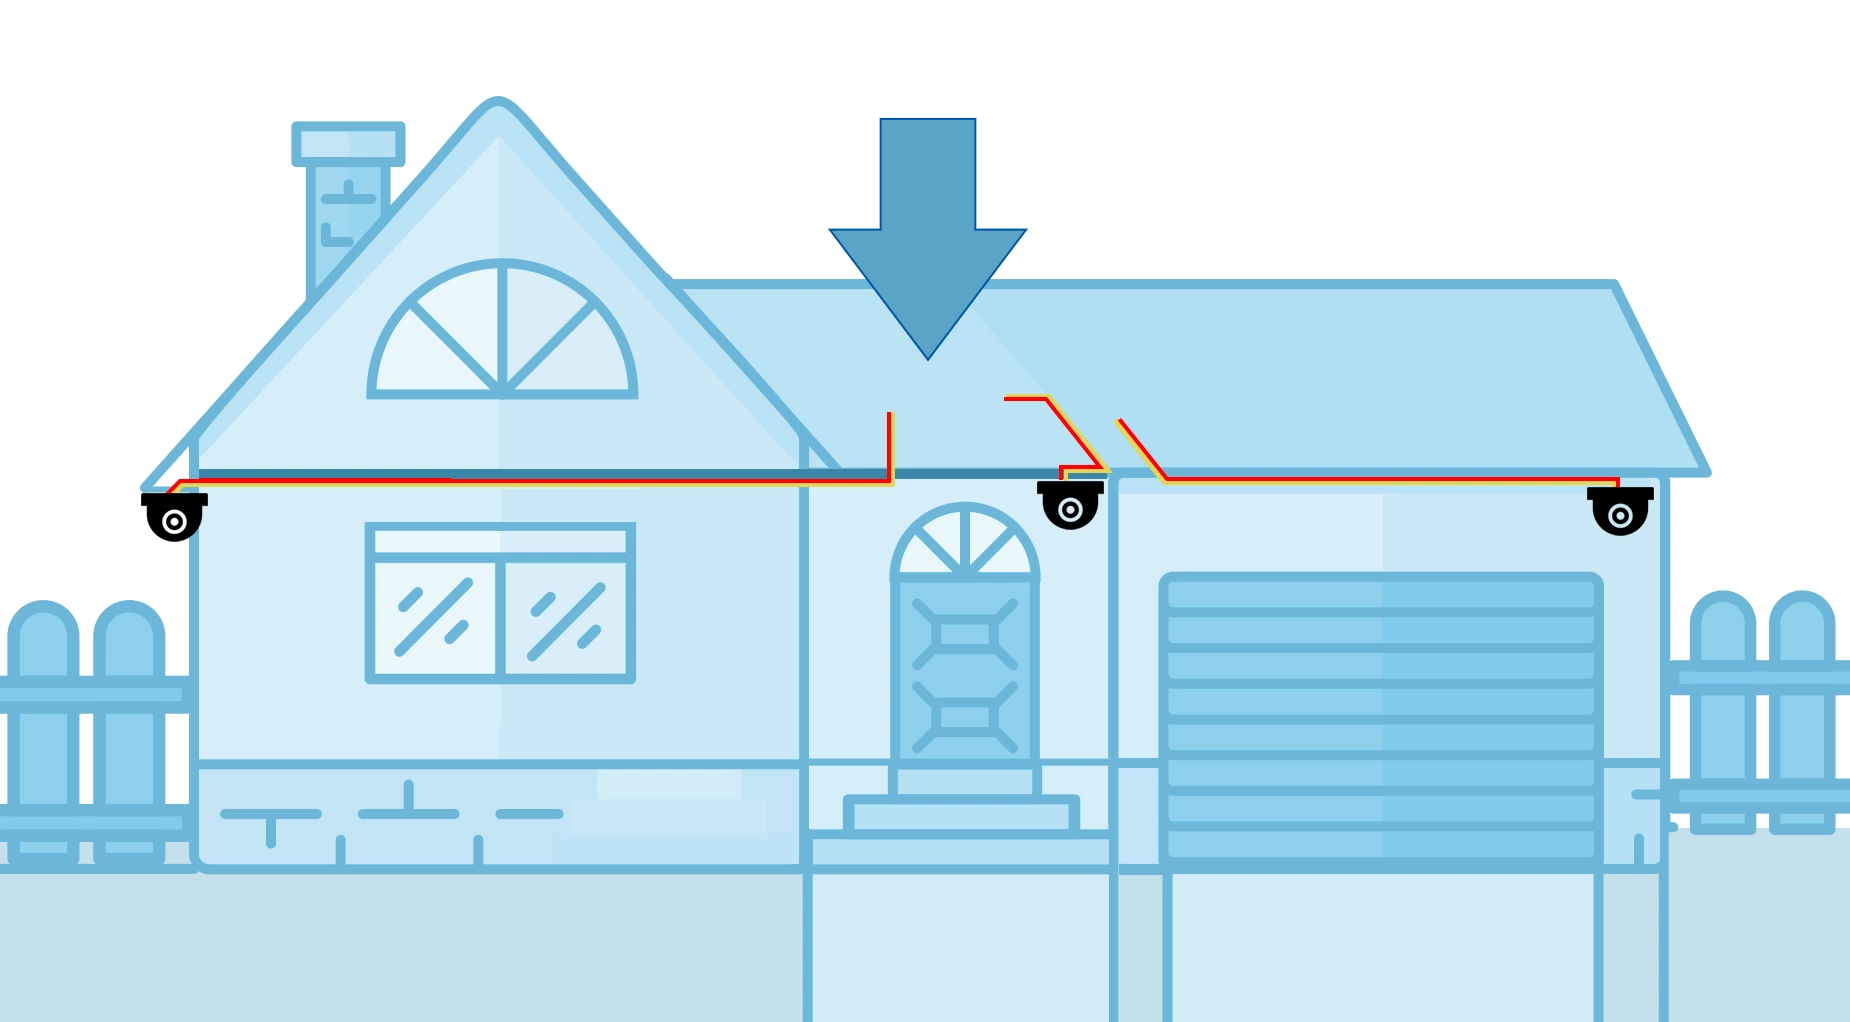
There is no single mounting height that works for every house, but the camera should be high enough to reduce easy tampering while still providing a useful view of people’s faces and the area immediately around the entrance. Many installation guides use roughly 8 to 10 feet outdoors as a practical starting range, but the correct height depends on the camera, property, mounting surface, and viewing objective.
Mounting a camera extremely high can create a security problem of its own: people may appear only as the tops of their heads. A slightly downward angle can help keep faces and the relevant approach in view.
Before permanently mounting the camera, temporarily position it and check the live view. Walk toward the house from several directions, open gates, approach the door, and move through areas you expect the camera to monitor.
Source: cctvinstallationsdubai.com
Avoid an extreme downward angle
A steep angle can make faces harder to capture and may leave the approach outside the most useful part of the frame.
Avoid direct glare
Do not aim directly at strong sunlight, bright exterior lights, or reflective surfaces when another angle can provide the same coverage.
Check the entire frame
Look for branches, roof edges, walls, railings, vehicles, and other objects that create blind spots.
Test before drilling
Use temporary positioning to confirm the view during daylight and darkness before making permanent mounting holes.
Why Camera Height Matters
Height affects both security and image quality. A camera mounted too low may be easier for someone to reach, while a camera mounted too high can produce a steep downward perspective. The practical target is a position that is difficult to tamper with while still giving the camera a useful view of the person’s face and approach.
Camera specifications also matter. Wide-angle, panoramic, PTZ, doorbell, and fixed-lens cameras can produce very different views from the same mounting point, so placement should be based on the actual camera rather than a generic diagram.
Use the manufacturer’s guidance
Check the camera’s installation instructions for recommended mounting height, detection range, minimum distance, and field of view.
Test at night
Night vision can reveal problems that are invisible during the day, including glare, reflections, and dark areas.
How Many Security Cameras Does a House Need?
There is no universal camera count because houses differ in size, layout, number of entrances, driveway configuration, detached structures, and privacy boundaries. A better method is to count the distinct access routes that need useful coverage.
For a compact home with one front entrance, one driveway, and one rear entrance, a small number of strategically positioned cameras may cover the most important areas. A larger property with multiple side gates, garages, patios, and detached structures may need more.
Do not add cameras simply to increase the number. If two cameras overlap heavily while a side entrance remains completely uncovered, moving one camera may provide more useful security than purchasing another.
Source: emcsecurity.com
Small home
Start with the front door, driveway or garage approach, and rear entrance if it is accessible.
Typical suburban property
Consider front entry, driveway, rear entry, and side access before adding coverage to secondary areas.
Large property
Map separate gates, detached garages, sheds, long driveways, and other access routes that cannot be seen from the main house cameras.
Complex layout
Use overlapping views around corners or multiple approaches when a single camera leaves meaningful blind spots.
A Simple Camera Placement Planning Method
Draw a basic floor plan and property outline. Mark every exterior door, garage door, gate, accessible ground-floor window, driveway, walkway, and detached structure. Then draw the approximate field of view of each planned camera.
Next, walk the property as if you were approaching the house from the street, driveway, side gate, and backyard. If you can reach an important entrance without appearing clearly on any camera, you have identified a coverage gap.
Finally, check the plan against power availability, Wi-Fi or wired network reach, nighttime lighting, mounting surfaces, privacy boundaries, and the camera’s documented field of view.
Step 1
Mark all doors, gates, driveways, accessible windows, and detached structures.
Step 2
Assign each camera one primary coverage job.
Step 3
Look for gaps between camera views.
Step 4
Verify power, network connectivity, lighting, and privacy.
Step 5
Test every planned position before permanently installing the cameras.
Common Security Camera Placement Mistakes
Many camera problems come from placement rather than the camera itself. A high-resolution camera cannot compensate for a blocked lens, severe glare, an uncovered entrance, weak connectivity, or a view that places people too far away.
Review the camera position from the perspective of the event you actually want to record. If the purpose is identifying a person approaching the front door, the test should involve a real person walking toward the door at different times of day.
Source: engineeringdiscoveries.com
Mounting too high
An excessive mounting height can produce footage dominated by the tops of people’s heads.
Covering the wrong area
A large view of the lawn is less useful if a side gate or rear entrance remains outside the frame.
Ignoring nighttime conditions
Daylight footage can look good while nighttime infrared reflections, darkness, or glare make the same camera ineffective.
Pointing into bright light
Sunlight, headlights, and bright fixtures can create glare or reduce visible detail.
Ignoring connectivity
A Wi-Fi camera placed at the edge of reliable coverage may produce connection problems even when the camera’s physical view is excellent.
Overlooking privacy
A camera should not unnecessarily monitor private areas simply because its lens can see them.
Skipping playback tests
Always review recorded footage to confirm that faces, vehicles, entrances, and movement routes are actually visible.
How to Tell Whether Your Camera Is in the Right Place
A successful placement should show the intended entry or approach clearly, provide enough detail to understand what happened, work under expected lighting conditions, and avoid unnecessary private areas. Test the camera by recreating normal movement rather than judging the view only from the live preview.
Walk toward the camera from the driveway, walkway, gate, and door. Test both directions of travel. Repeat the test at night, with normal exterior lighting, and with vehicles parked where they normally sit. Review the recordings rather than relying only on what the live view looks like.
Clear subject
People and vehicles remain large enough in the frame to provide useful information.
Continuous route
Important movement does not disappear immediately because of a corner, wall, plant, or vehicle.
Reliable recording
The camera remains connected and records when expected.
Useful night footage
The image remains usable after dark without excessive glare or infrared reflection.
Security, Privacy, and Legal Considerations
Camera placement involves more than physical coverage. In the United States, privacy and recording rules can vary by state and circumstance, and homeowners should not assume that every type of recording is treated the same way everywhere. Audio recording can be particularly sensitive because state consent requirements may differ.
Your HOA, landlord, condominium association, municipality, or property rules may also affect where exterior devices can be mounted. These rules can be especially relevant when cameras are attached to shared structures, common areas, or exterior surfaces controlled by someone other than the homeowner.
A practical approach is to keep the camera’s field of view focused on your property and the security purpose that justified the camera. Where supported, privacy masking can help block parts of the image that do not need to be recorded.
Source: emcsecurity.com
Check state and local rules
Verify applicable privacy and recording requirements, especially before enabling audio recording.
Check HOA or property rules
Review community, condominium, lease, or property-management requirements before installing exterior equipment.
Limit unnecessary recording
Frame cameras around your own security needs instead of intentionally monitoring private areas belonging to others.
Use privacy features
Enable privacy zones, masking, or other controls when they help keep irrelevant areas out of recordings.
Protect the Cameras and Their Accounts Too
A security camera is part of your connected-home network, so physical placement is only one part of protecting it. The Federal Trade Commission recommends securing the home router, using strong passwords, keeping software updated, and using appropriate Wi-Fi security. It also suggests considering a separate network for cameras and other smart devices.
If your camera supports two-factor authentication, encryption, automatic updates, or other account-security features, review the manufacturer’s documentation and enable appropriate protections. A camera that is physically well positioned but poorly secured online can create a different type of privacy problem.
Use strong account credentials
Avoid reused or easily guessed passwords for camera accounts.
Keep software current
Install security and firmware updates provided by the camera manufacturer.
Secure your router
Use current Wi-Fi security and keep the router’s software updated.
Consider network separation
A separate network for cameras and smart-home devices can reduce the potential impact of a compromise on other devices.
Frequently Asked Questions
Q
Where is the best place to put a security camera outside a house?
Start with the front door, driveway, garage entrance, rear door, and side gate or other accessible entry routes. The best position is one that clearly captures the approach and entrance without unnecessary blind spots or privacy intrusion.
Q
How high should outdoor security cameras be mounted?
Many home-security installation guides use roughly 8 to 10 feet as a practical outdoor starting range, but there is no universal height. The camera’s field of view, mounting surface, property layout, and ability to capture useful facial detail should determine the final position.
Q
Should security cameras be placed at the front and back of a house?
Usually, yes, when both entrances are accessible and cannot be adequately covered by another camera. The front and rear approaches can have very different sightlines, so covering one does not automatically provide useful coverage of the other.
Q
Should I put a security camera in my backyard?
A backyard camera can be useful when the yard contains a rear entrance, gate, patio door, shed, detached garage, pool, or another area that needs monitoring. Prioritize those specific access points instead of automatically placing a camera in the middle of the yard.
Q
Where should you not put security cameras in your house?
Avoid bathrooms and generally avoid bedrooms and other highly private spaces. Indoor cameras are usually better suited to shared areas, hallways, stairways, and specific security routes. Outdoor cameras should also be framed to avoid unnecessarily monitoring private areas belonging to neighbors.
Q
Should security cameras face the street?
A camera may include some publicly visible street or sidewalk area when that is necessary to monitor an approach to your home, but a very wide street-facing view is not automatically better. It can create unnecessary alerts and capture more activity than needed. Use the narrowest useful view and available privacy controls.
✦ Wrapping Up
Conclusion
The best answer to where to place security cameras around your house is to start with access routes, not camera quantity. For most U.S. homes, that means prioritizing the front door, driveway, garage, rear entrance, side gate, and other accessible ground-floor approaches.
After choosing the locations, test each camera from the perspective of an approaching person or vehicle. Check the image during both daylight and darkness, look for glare and obstructions, verify network or power reliability, and make sure the camera does not unnecessarily record private areas.
A carefully planned system can provide more useful coverage than simply adding more cameras. Map your property, identify the routes that matter, assign each camera a clear purpose, and adjust the installation before permanently mounting the equipment.
💡 Key Takeaway
Walk the perimeter of your property and mark every door, driveway, gate, garage, and other accessible approach. Cover those routes first, test each camera in day and night conditions, and then add secondary cameras only where a meaningful blind spot remains.
I’m Ethan Carter, a home security systems specialist at Diggons.com. I focus on modern surveillance solutions and smart protection technologies that help people keep their homes safe and secure.
I have hands-on experience working with security cameras, video doorbells, alarm systems, and motion detection devices. I test real products and explore practical setups so I can provide clear, easy-to-follow guidance for everyday users.
My goal is to simplify home security by helping you understand how these systems work, how to fix common issues, and how to choose the right products with confidence. At Diggons.com, I share honest insights, comparisons, and real-world advice to make home security easier and more effective.